
01 May How to create Botanical Contact prints at home (ENG)
What is a Botanical contact print?
A Botanical contact print (also known as an ‘eco-print’) is a print of a leaf or flower made on fabric or paper. By bundling them together, then by boiling or steaming them, they leave gorgeous colours, shapes and marks on the paper or fabric. It was first discovered by India Flint. (you should check out her beautiful work!)
Materials you need
There are different ways to do this. You can roll your fabric or paper around something, like an old rusty can. Or you can press your paper or fabric flat between some cardboard. Most of the time I roll my fabric, and press my paper. Because I find rolling paper doesn’t work that great. So you need different materials for the different techniques. I will explain both ways, but focus on the technique with the paper.
There are several things you need in both cases:
- A pan. You can’t use it for food after using it for eco-printing.
- Some yarn, rope or fabric strips to hold the bundle together.
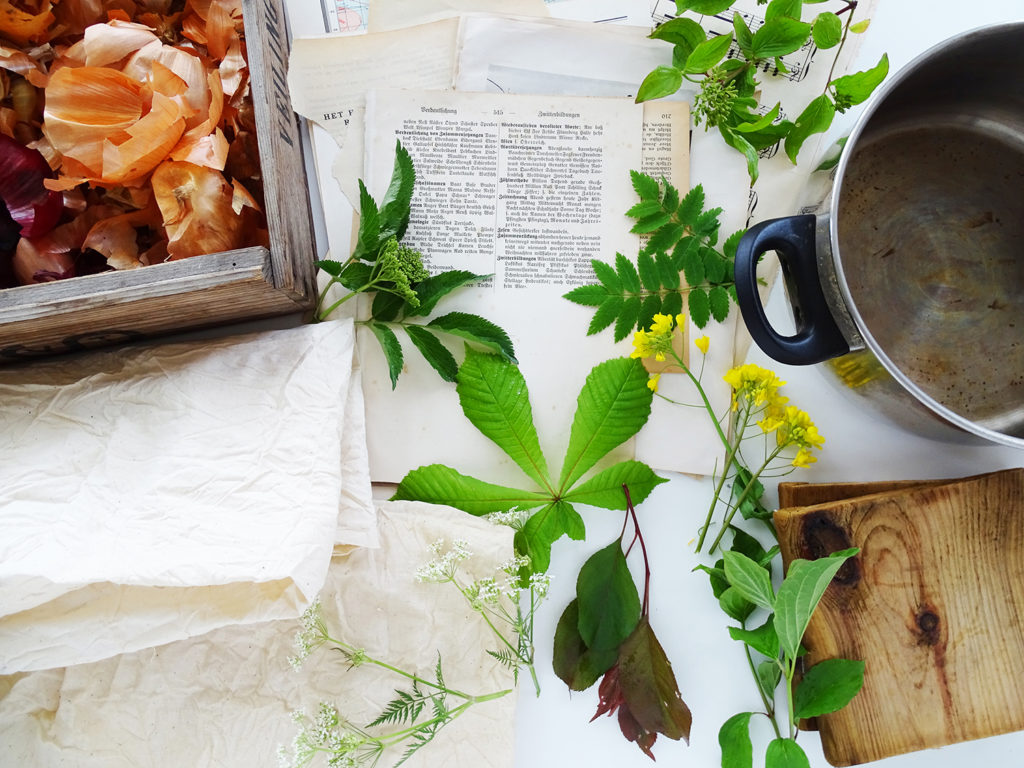
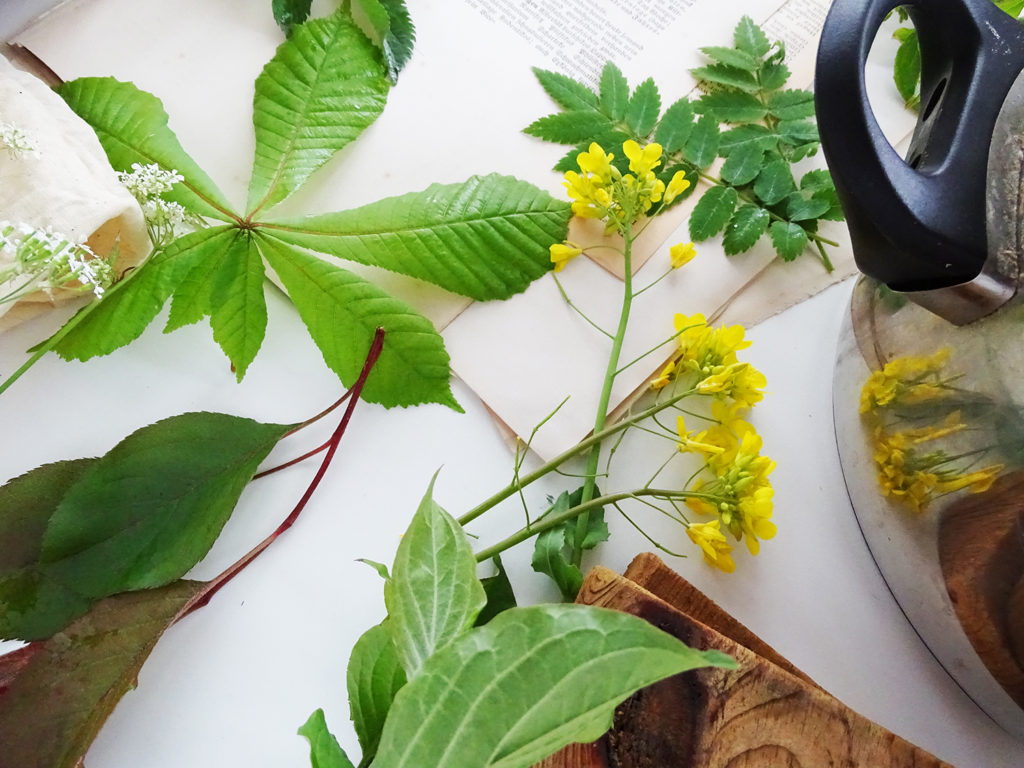
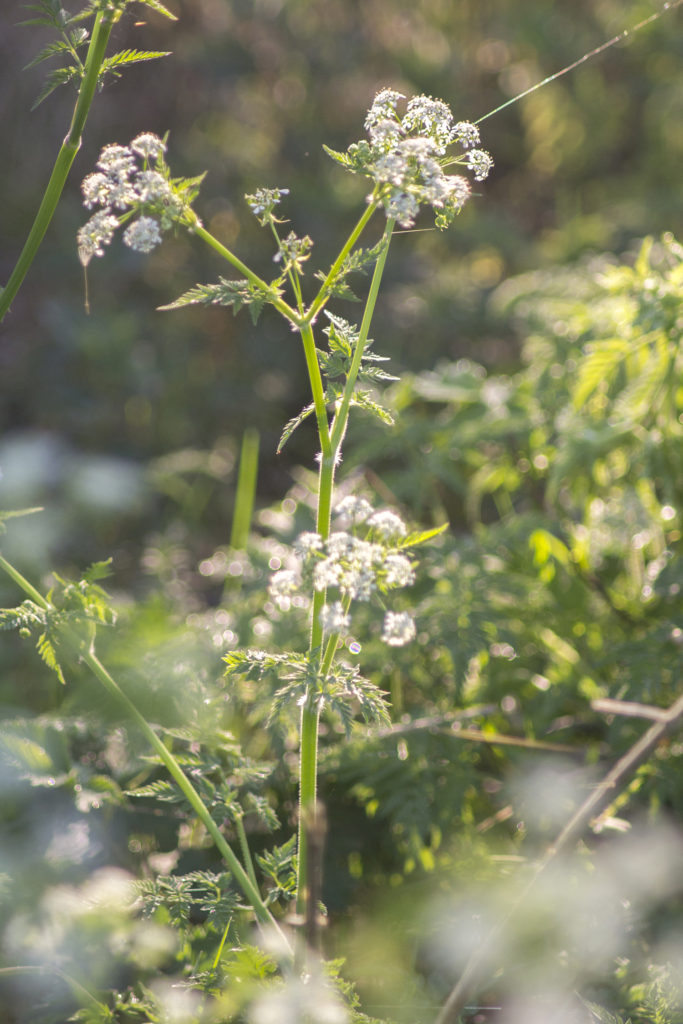
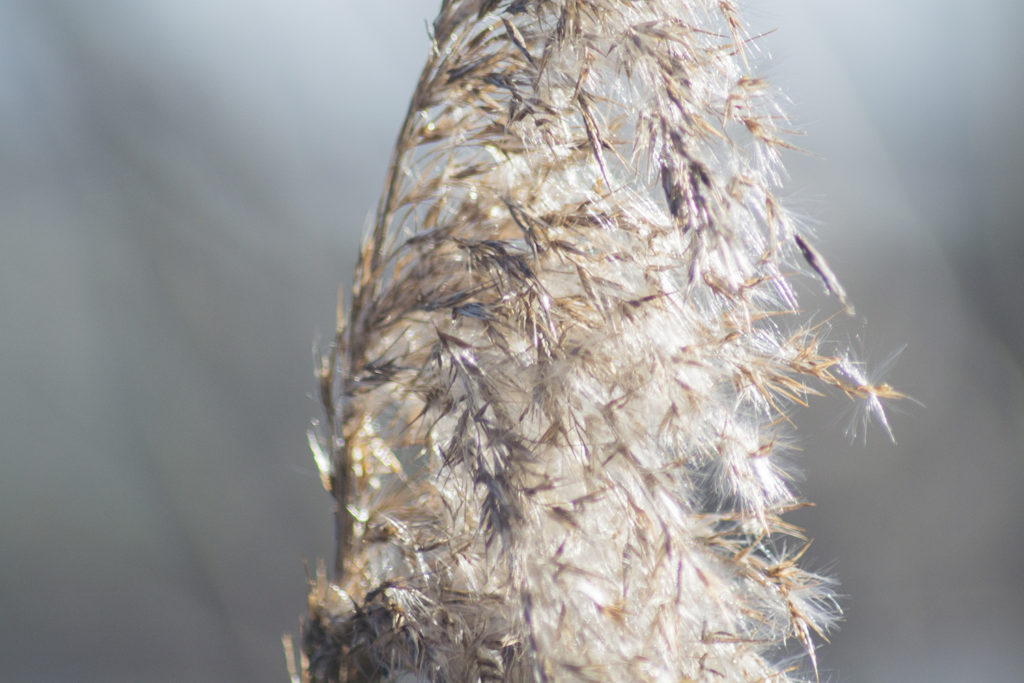
- Dye stuff to use in the bundles. For example: leaves, herbs, tealeaves, turmeric, flowers… Pick things with fun shapes or fun colors.
- Dye stuff to use in the boiling water. For example: onionskins, leaves, treebark, turmeric, acorns… Pick things that give off color easily.
If you want to work with paper you need these materials:
- Paper. I like to fold my paper into a concertina book, but you can also just layer them flat on top of eachother. Heavy paper is better, but printingpaper also works! Make sure it fits inside the pan.
- Something to press the paper between Some old cardboard, ceramic tiles or wood.
If you want to work with fabric you need these things:
- Fabric. Linnen, cotton, old bedsheets, clothes, anything works. Altough some better than others.
- Something to roll the fabric around. An old rusty tin can, old glass jar, a copper pipe. Make sure it fits inside the pan.

So, how does this work?
First I’ll show you how to make eco-prints by pressing leaves between paper. Then I’ll explain how to roll bundles.
Eco-printing by pressing leaves between paper
Step 1: Gather supplies
Collect the materials I talked about. Then go outside and take a walk around the block, or your garden. Collect the dyestuff. Maybe you have an old teabag lying around the house, or a bouquet that’s close to dying. You can use anything you can find.

Step 2: Arrange the leaves on the paper
Fill your pan with a layer of water. Just enough to dip your paper in. To submerge them with water.
Place your cardboard, ceramic tile or whatever you use on the table. Then pick a piece of paper, dip it in the water and place it on the cardboard. Now pick some leaves and place them on the paper, In whatever composition you like! Then place another wet paper over that and get some more leaves to place them on the paper. You continue to layer up this way: a piece of wet paper, some leaves, more paper, leaves, paper…
Until you think your bundle is big enough. Then put the second piece of cardbord on top and tie them together very, very tight with the string you use.
In the video below you see me doing this. I place the leaves in a small folded concertina book. I dip the leaves in some nasty looking liquid. I’ll explain more about that below, at the ‘experiment’ section!
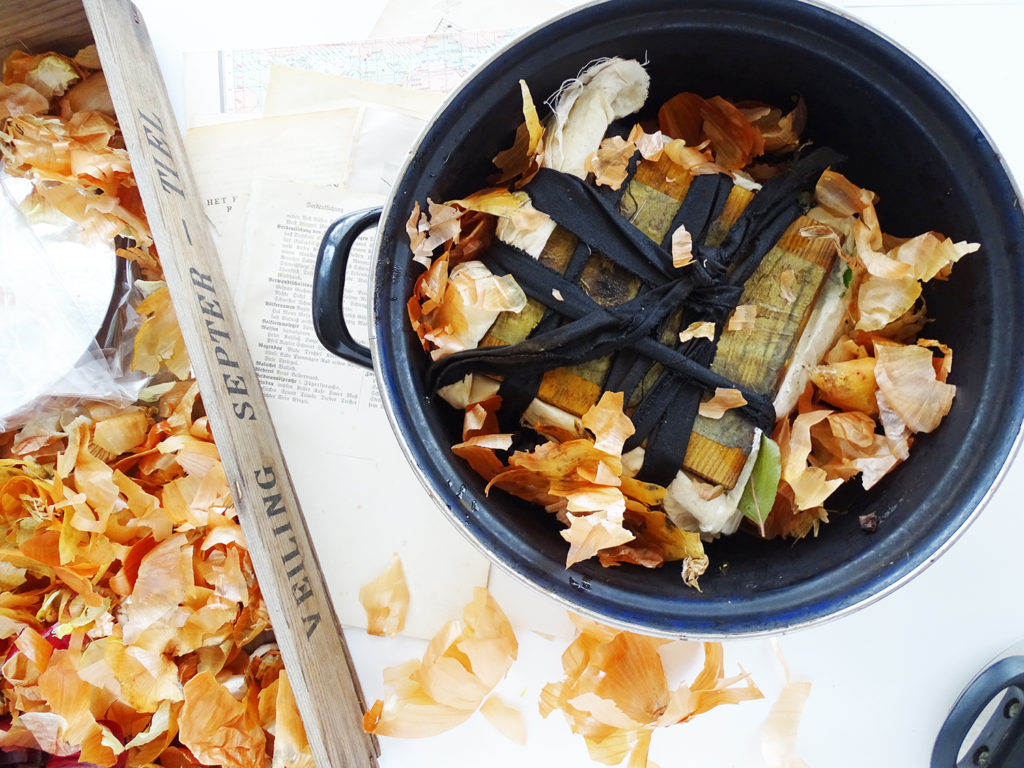
Step 3: Prepare the dye bath
Its time to place the bundle in the pan and cover it with water. To ‘spice’ up your bundle, you can stuff the pan with more dyestuff. Onionskins are a good way to start, they give beautiful colors when they get boiled. The more skins, the richer the color!
Step 4: Boil the water
Now is the time to boil the water. The water should boil for about an hour. You can experiment with boiling it a little bit longer, see what happens. Most of the time I’m way to impatient, so I try to do something else, distract myself. (I’m just too excited to see the results, okay! Don’t rush the process.)
Step 5: Unwrap the bundles
This is the absolute best part of the whole process! To unwrap your little gift and see what nature created.
You should get the bundle out of the water and let it cool a little bit so you don’t burn your hands. (Always hard for me, so I just do it while they’re still hot…)
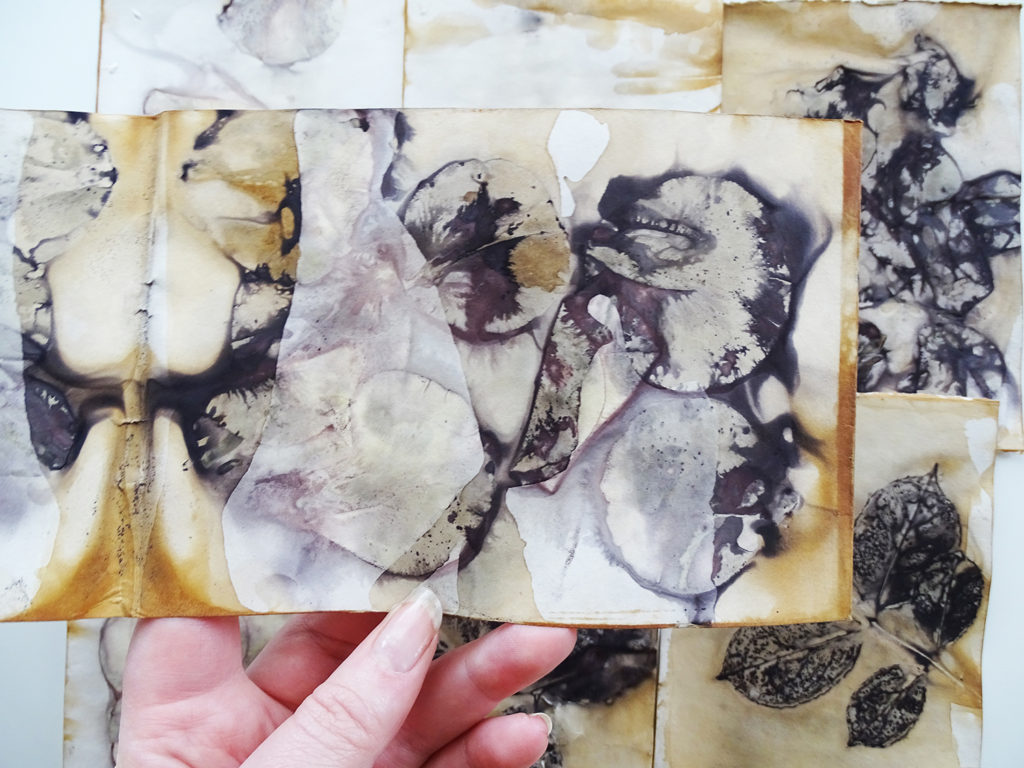
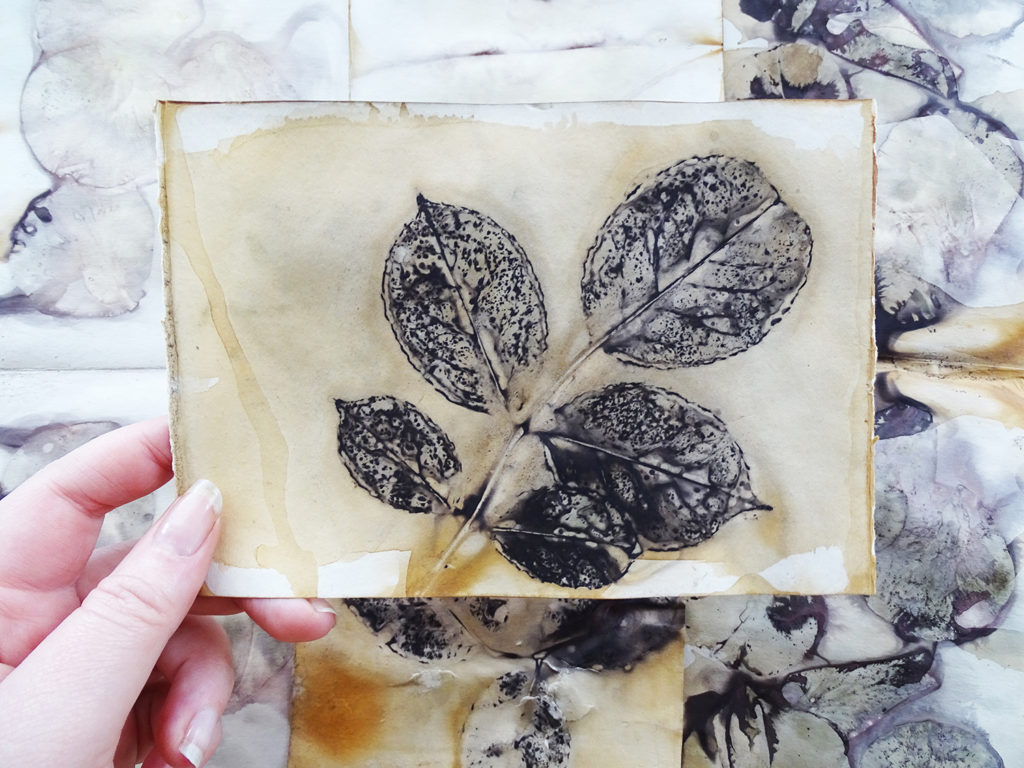
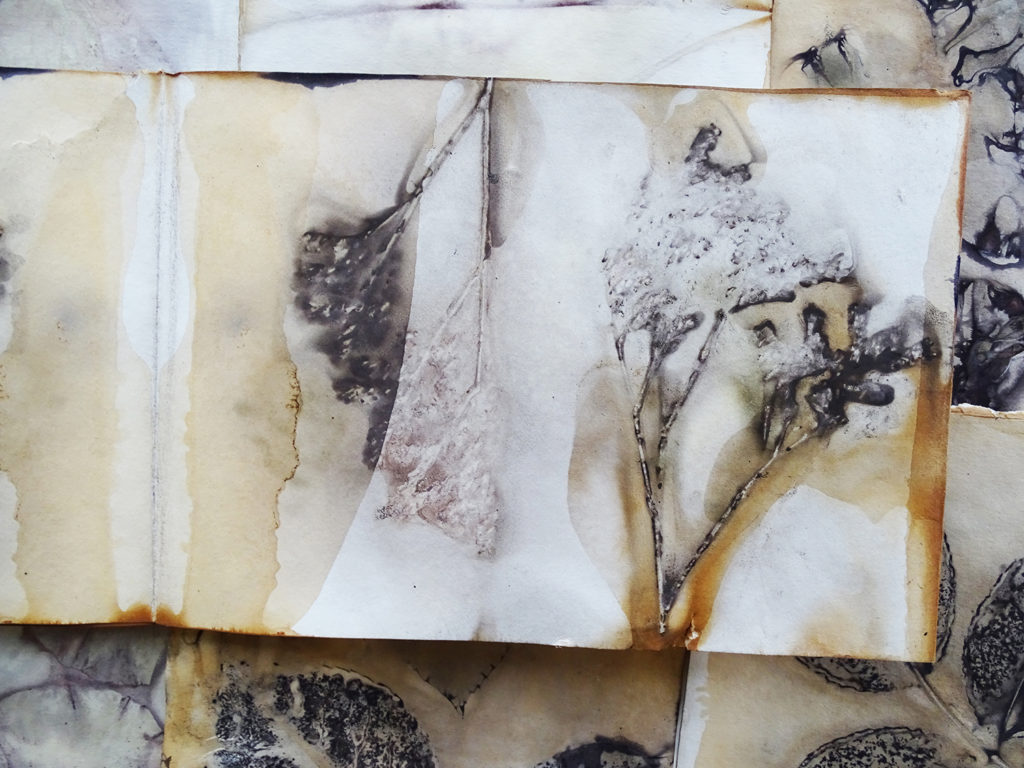
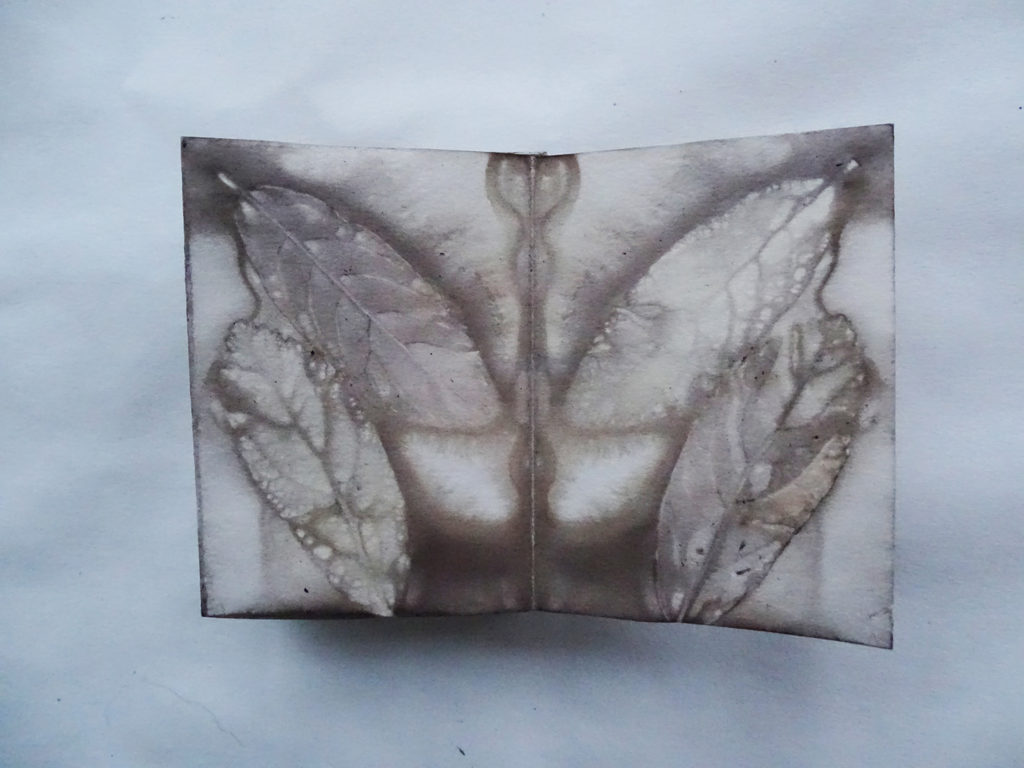
Untie the rope and take off the paper one at a time. The paper has been boiling for a while, so the paper is very fragile, handle it with care! Take the leaves off the papers. Let the paper dry on some old cloth, old cardboard or something.
What to do with the dyebath? You can save some of the dyebath in the freezer to use it a second time. Or you can give it back to nature by throwing it in your garden, or the compost bin.
In the video below you see me unwrapping a bundle. Its always a struggle, with a concertina folded book, but it works and I love it. You see some green paper inbetween the pages, I’ll explain more about that in the ‘experiment’ section!
Step 6: Create fun things with the paper
Enjoy the results! You can do all kinds of fun projects with these natural papers. I’ll demonstrate some fun projects in a follow-up blog.
Eco-printing by rolling leaves between fabric
Step 1: Gather supplies
Collect the materials I talked about. Then go outside and take a walk around the block, or your garden. Collect the dyestuff. Maybe you have an old teabag lying around the house, or a bouquet that’s close to dying. You can use anything you can find.
Step 2: Arrange the leaves on the fabric
Cut the fabric double the width of the can or pipe you roll the fabric around. We are going to fold it in half. It can be a lot longer, so you can wrap it around a couple of times.
Fill your pan with a layer of water. Just enough to dip your fabric in. To submerge it in the water.
Lay the fabric flat on the table. You can place the dyestuff over one half of the fabric.
Are there enough leaves on the fabric? Then it’s time to fold it so it’s the same size as the can. Then roll it. Place your pipe or can over the fabric and roll it up slowly. Make sure this is wrapped up very tight! Tie it up with the rope and a knot in the end.
Repeat step 3-6 as I explained above. It’s the same process for both.
Experiment
So, now you know the basics! Collect leaves; place them between fabric or paper; tie them up real good; boil them for an hour; enjoy!
There is way more to it that this. There is a lot you can experiment with. You can use mordants and binders to enhance your results. What are those? Do I hear you say. Well, a mordant is a substance that ensures the color adheres to the fabric a little better. A binder is kind of the same thing. It makes sure the color from the leaves adheres better to the fabric. A mordant I use is rust water. A binder can be soy milk, gelatine or yoghurt. I will only be explaining how the mordant works, not the binder. But you should know that they both result in different kind of colors, wich is fun to see!
Besides the mordants and binders, you can experiment with writing on your pages before boiling them. Or you can add colorful pages inbetween your bundle to add some pop of color. You can also use other kinds of papers, from old books for example. There is the option to add some yarn in your dyebath to create your own fun colored yarn to slow stitch with. And lastly you can fold papers in all kinds of ways to create fun patterns. I will show you all of this below!
Rust water and how to use it
Rust water: how to make it
When you want to create rust water you need a glass jar, some old rusty stuff that can fit inside the jar, like nails, paperclips or keys and you need vinegar. You should put the rusty items in the jar and top it off with vinegar. Leave it be for a few weeks, you’ll see the color change. It will become darker and darker. The vinegar makes sure the rust come off the items. You can use the rust water after maybe two weeks, or leave it longer and get darker colors.
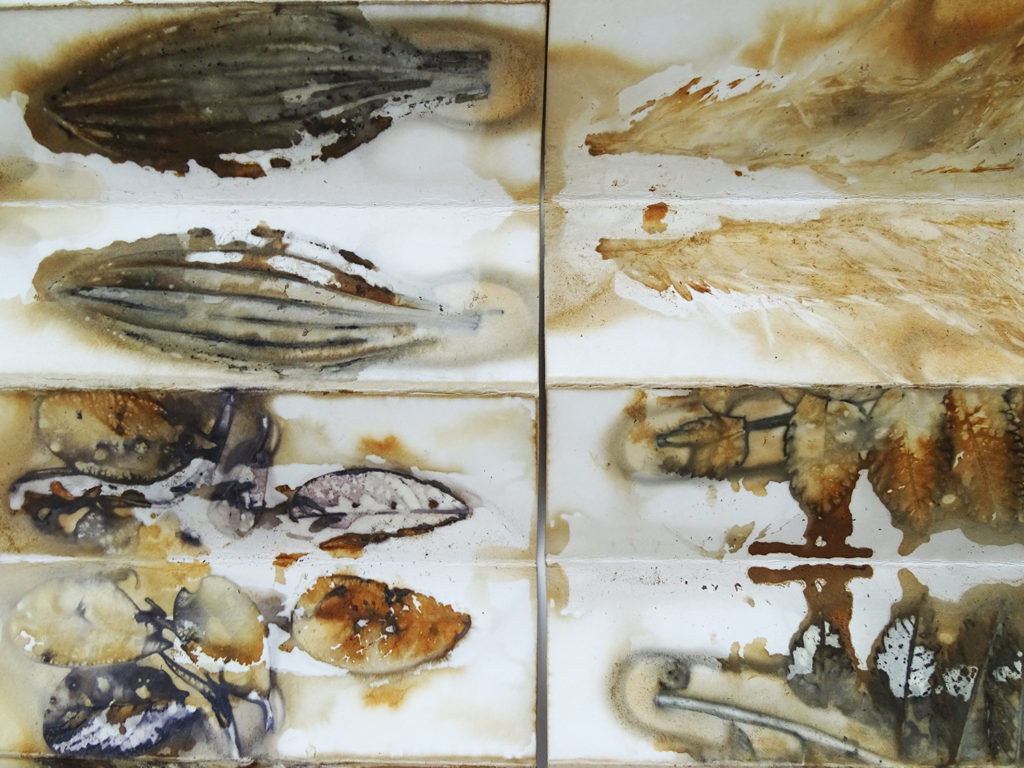
Rust water: dip your leaves in it
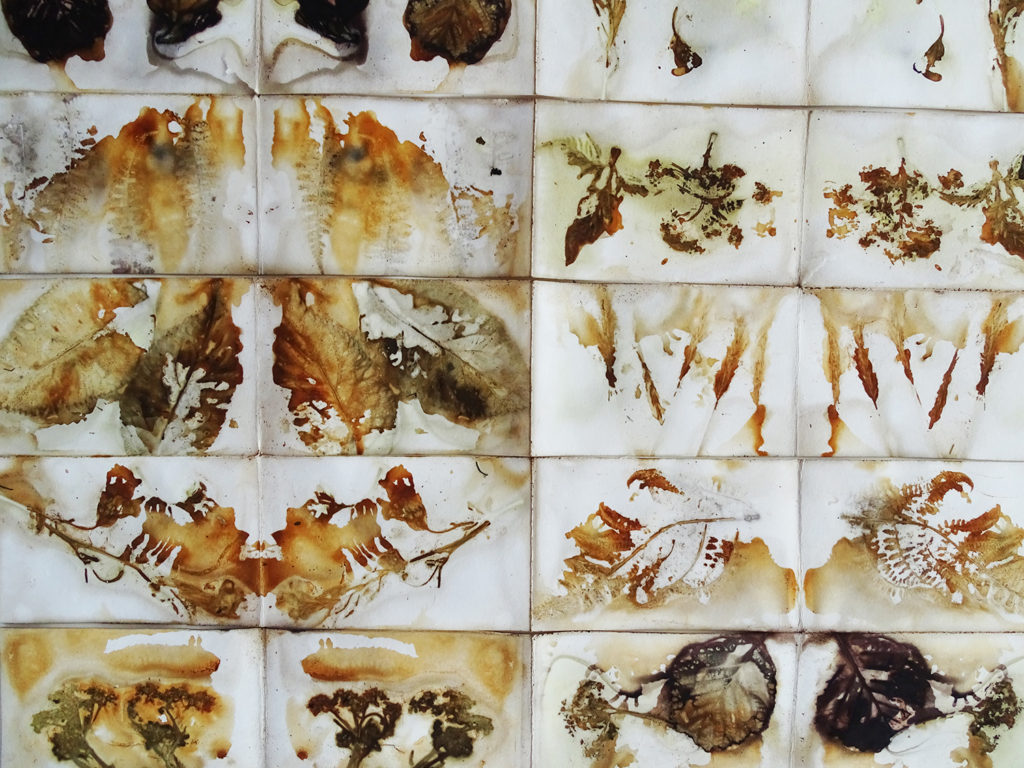
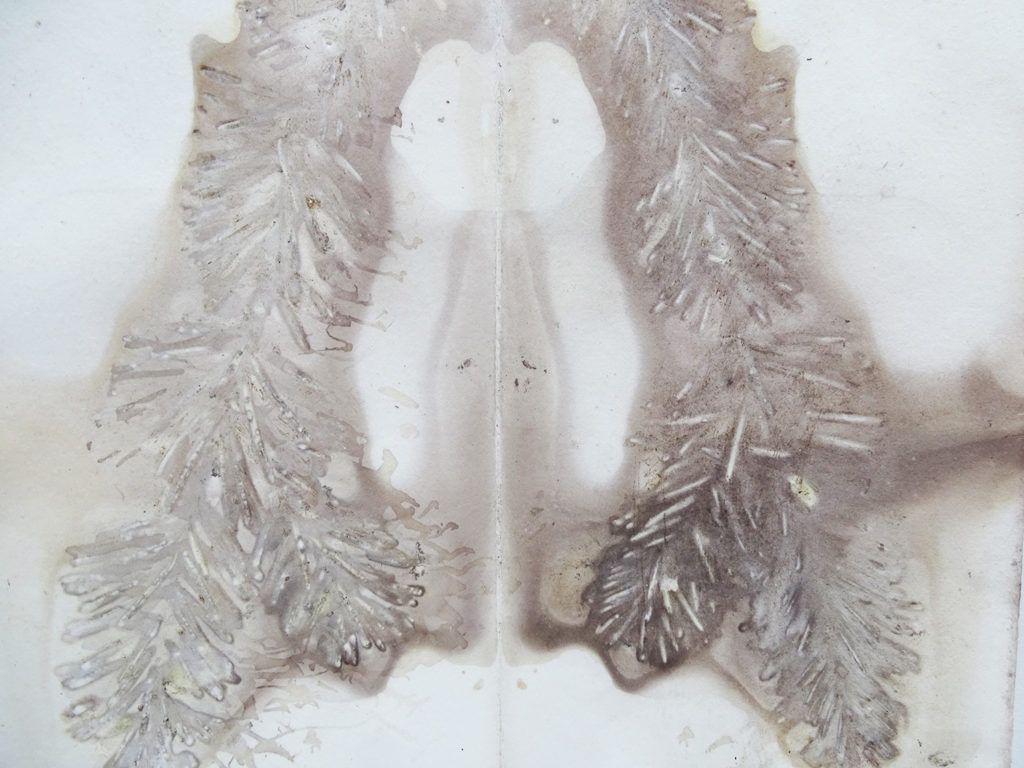
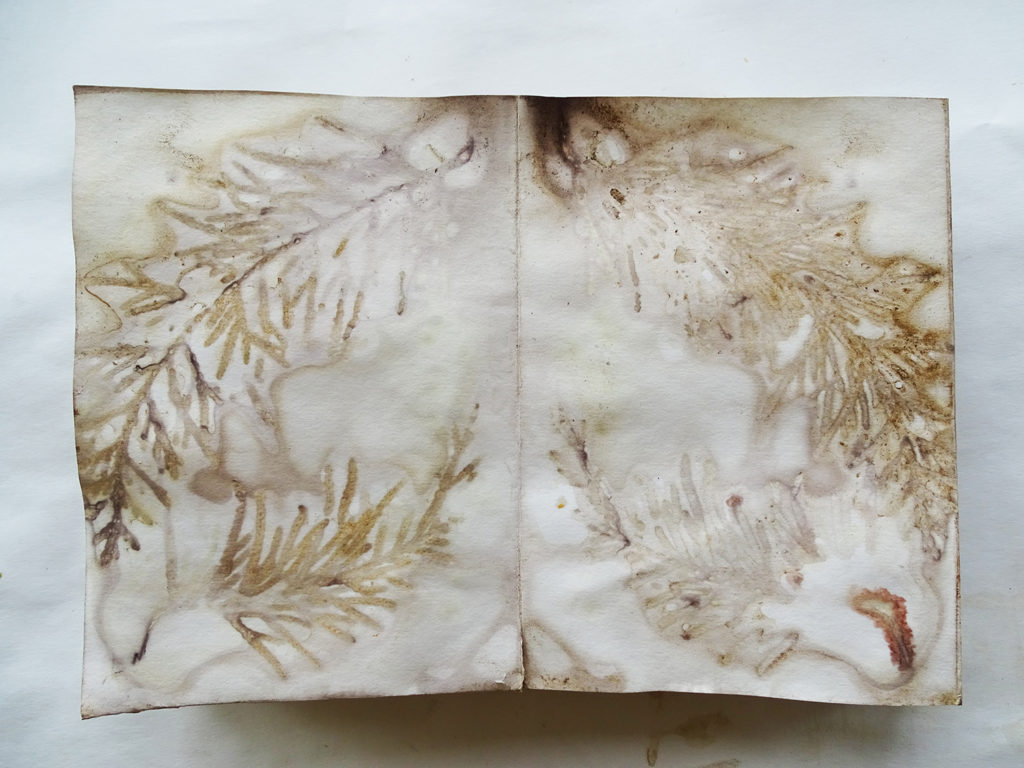
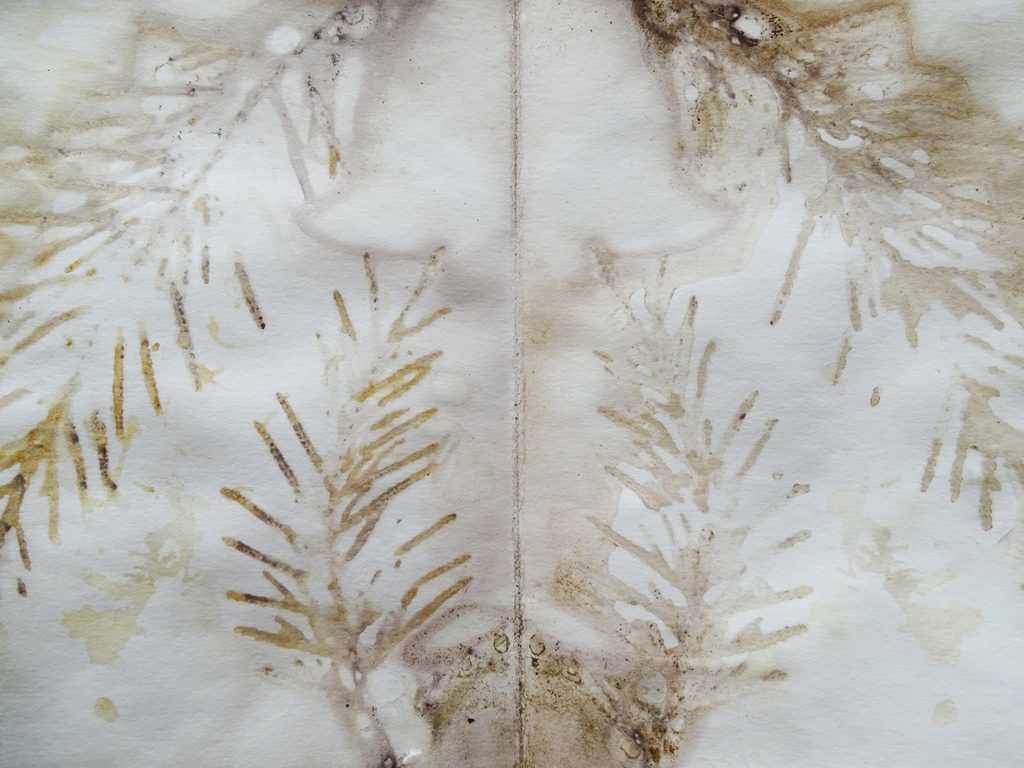
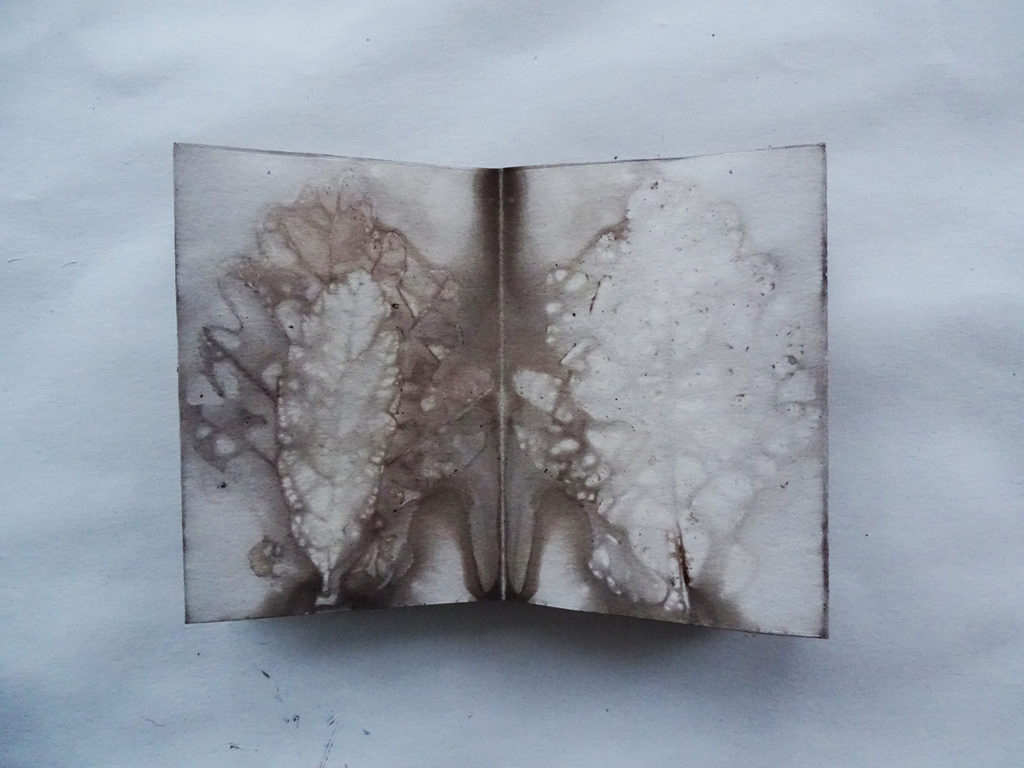
One way to use that rust water is for you to dip your leaves in. This is what I did in the first video. Just follow the regular steps, but dip the leaves in the rust water before placing them on the fabric or paper. Below you see a few of the results.
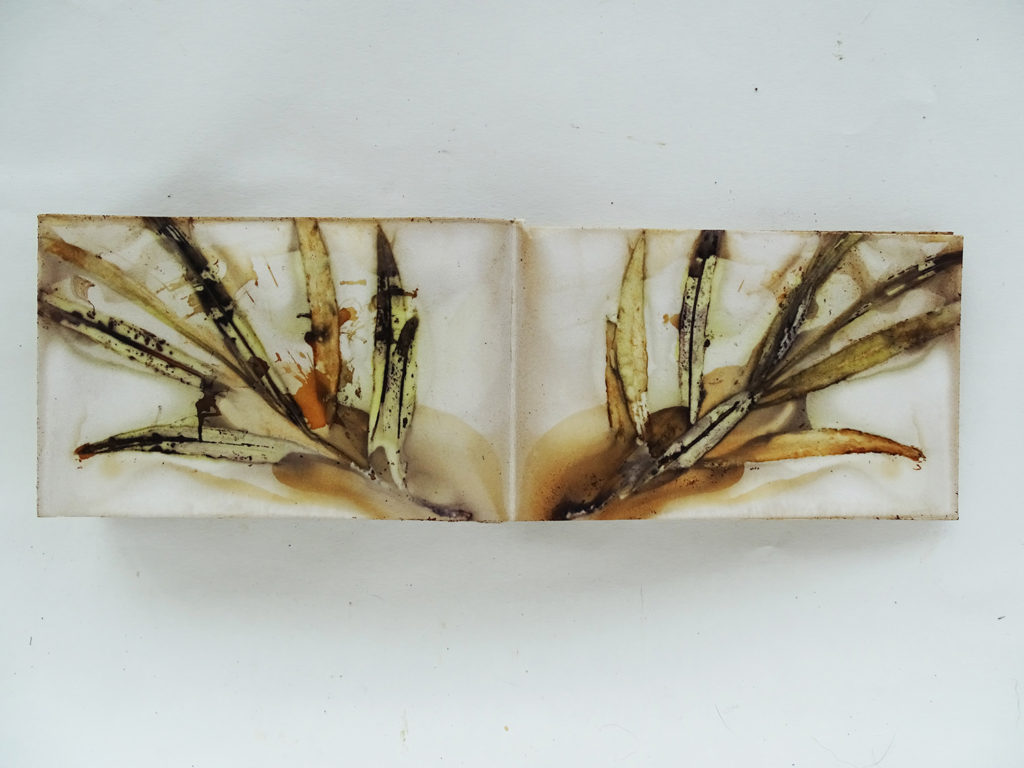
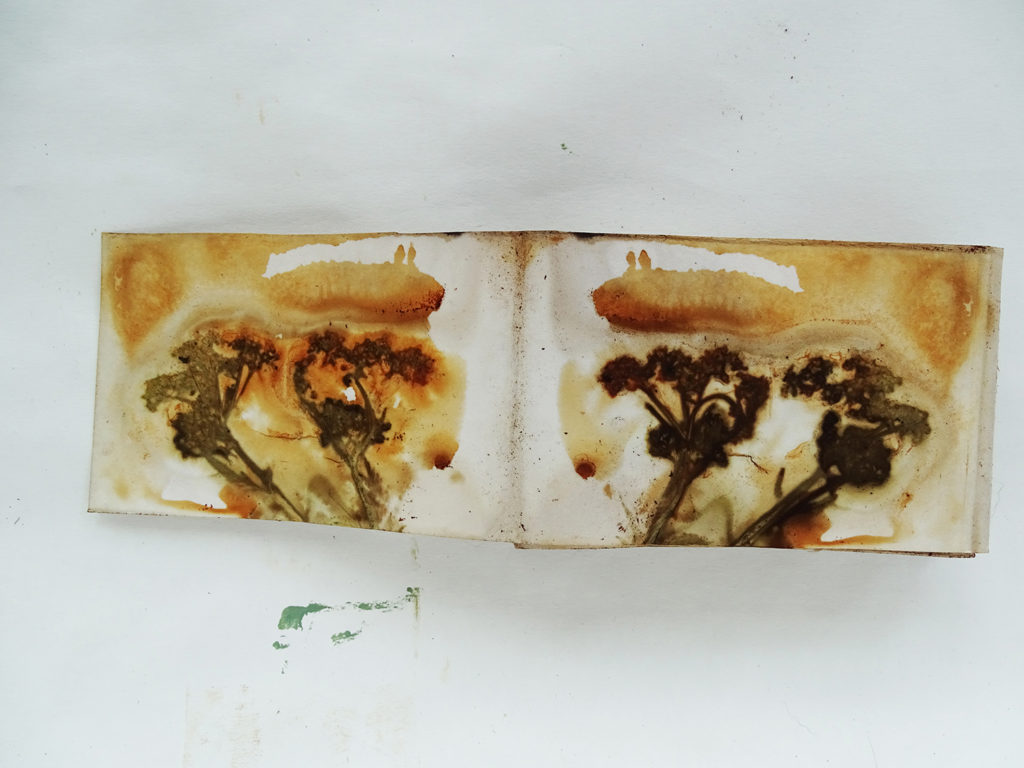
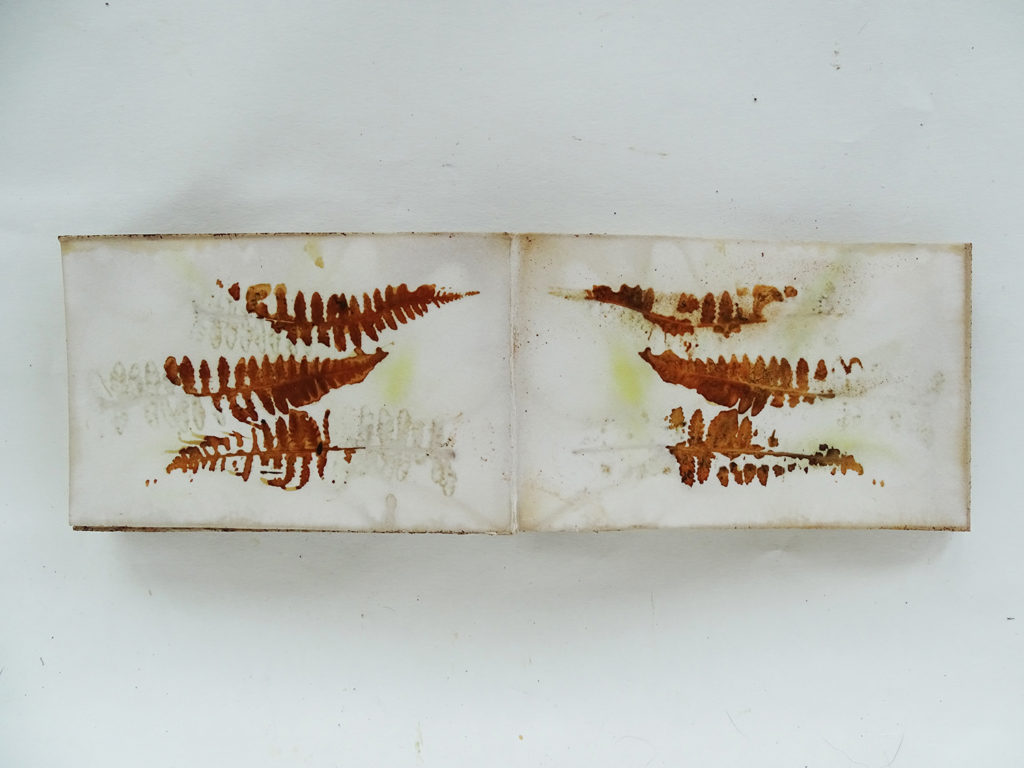
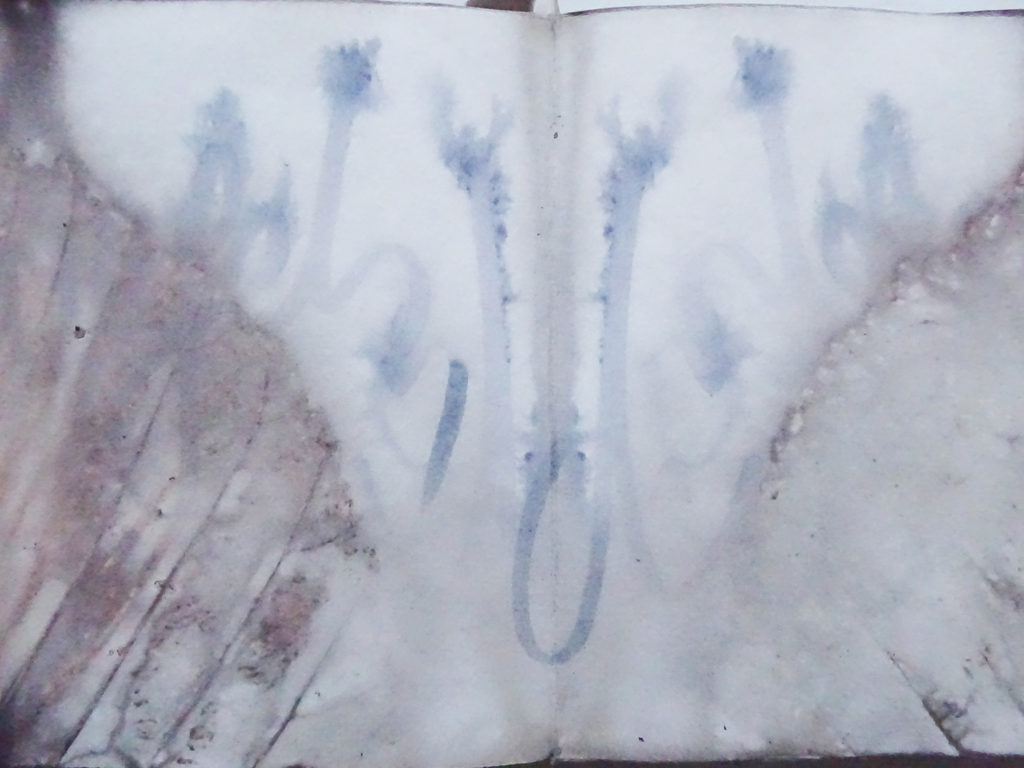
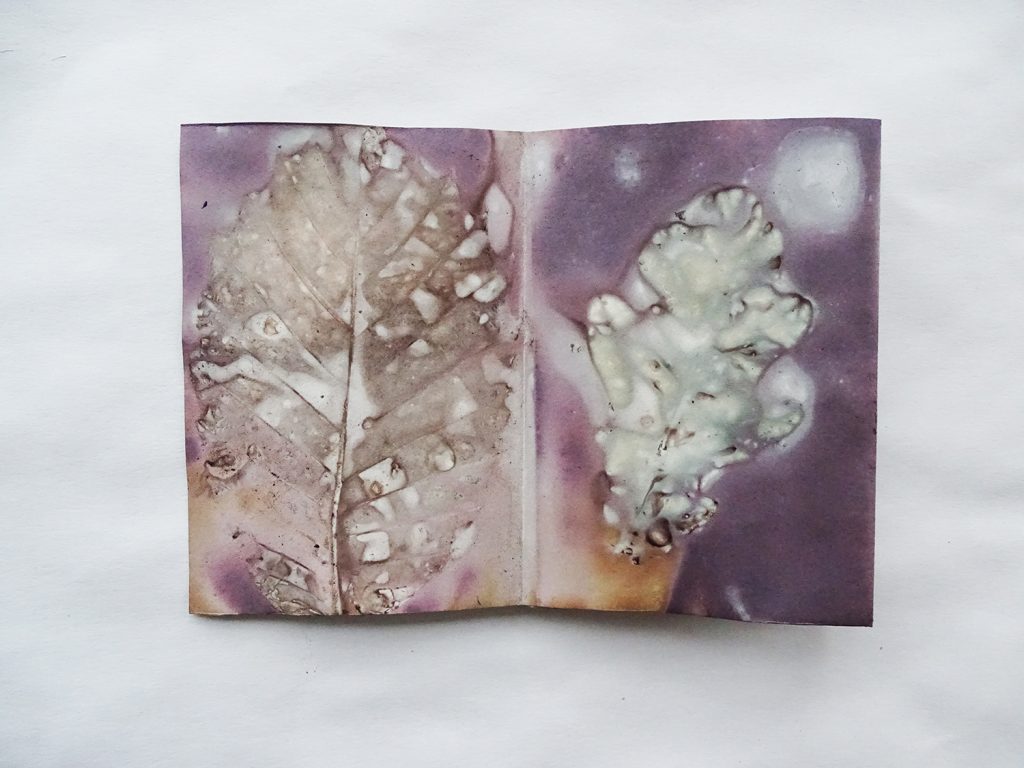
Rust water: prepare your paper with it
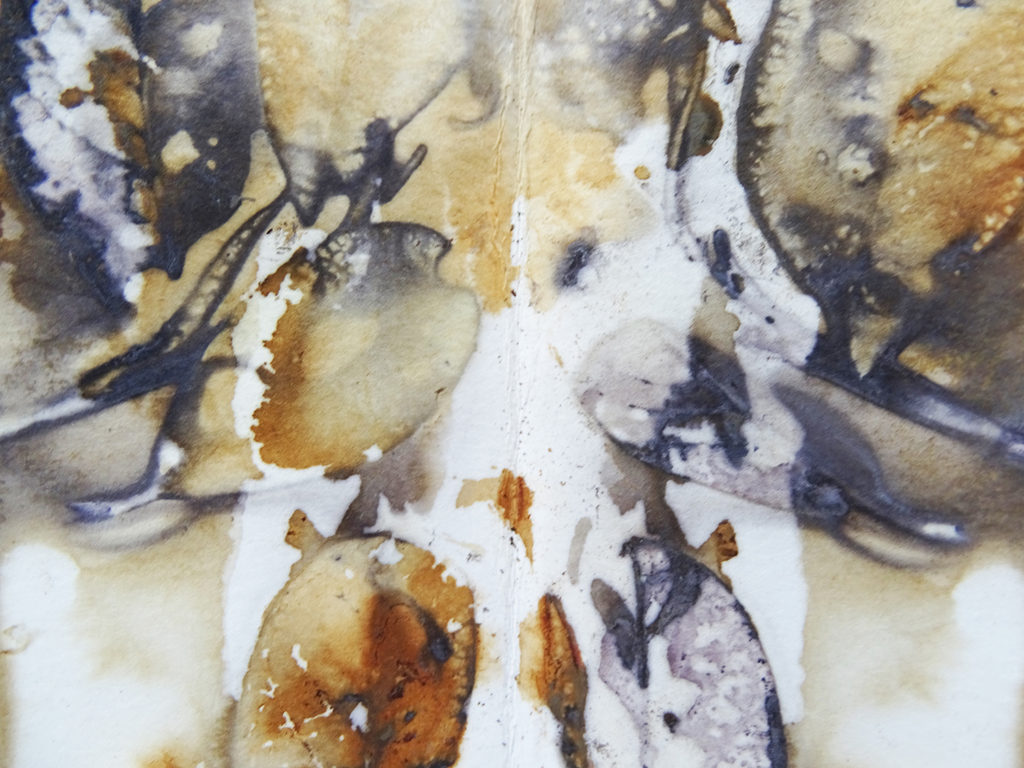
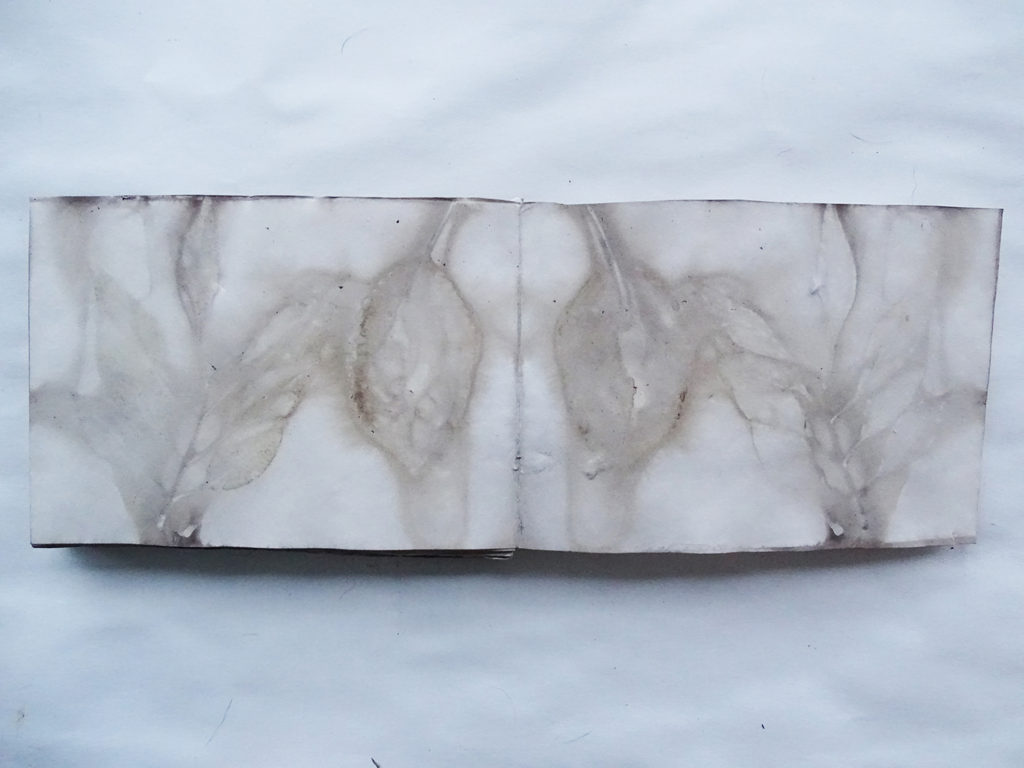
Another way to use that water is to dip your whole page in there, or use a foam brush to apply it on the paper. You can do it very neat, or just a few blobs and splashes and see what happens. Below you find some results. The print on the second picture is almost completely covered with the rust water. The other ones have just a few splashes. Where the print is very dark and bright, you see that the rust water did it’s job very well. The softer tones show that no rust water covered the paper, so the print is softer.
Rust water: use it in the dyebath
The last thing I wanted to explain is to use the water in the dyebath. Pour a little bit of the water in your dyebath before boiling the whole thing. A little goes a long way. The results tend to be a bit more grey when you only put rust water or tusty items in the dyebath. But you can combine it with onionskins or just about anything for a little pop of color.
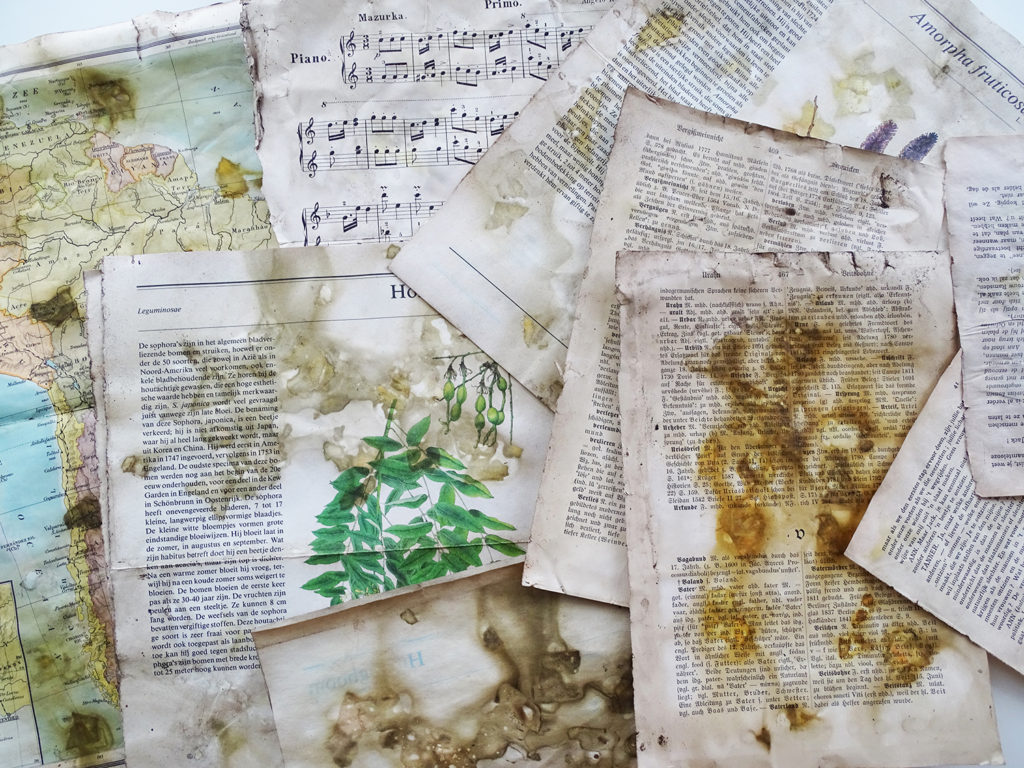
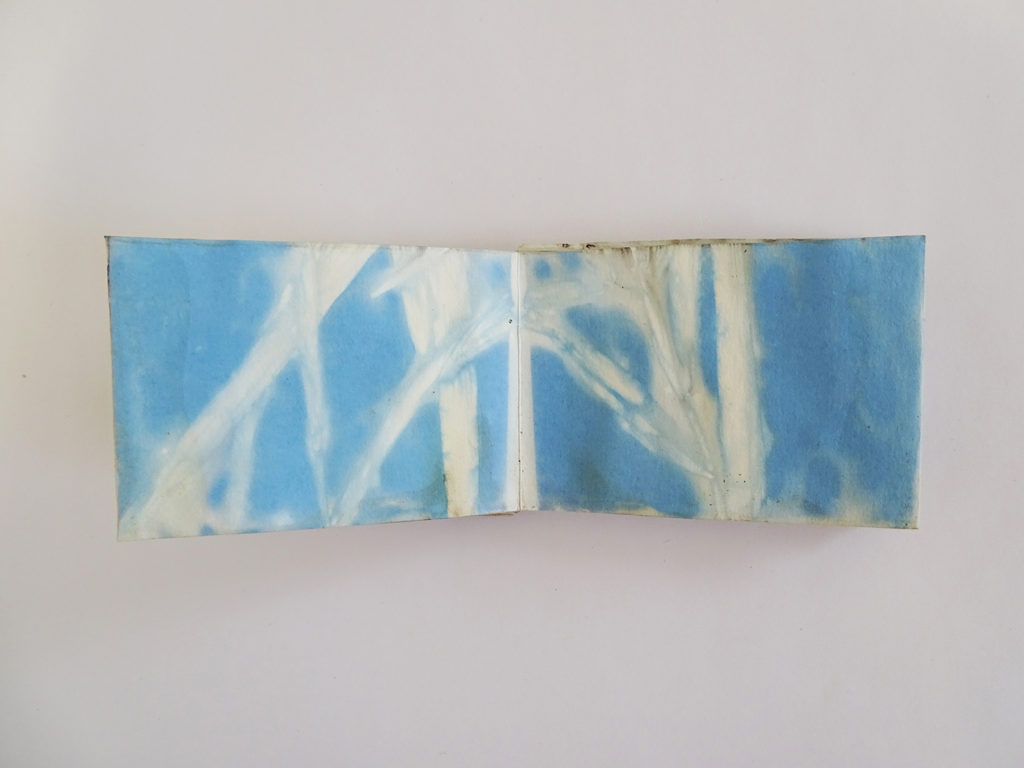
Write on your papers
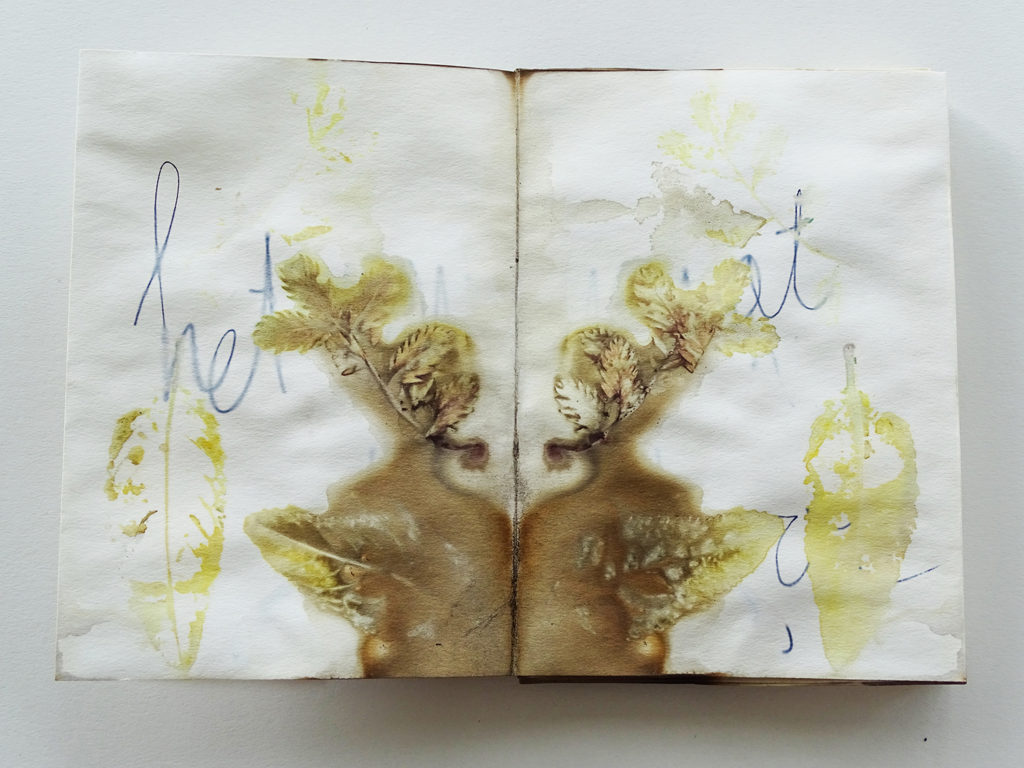
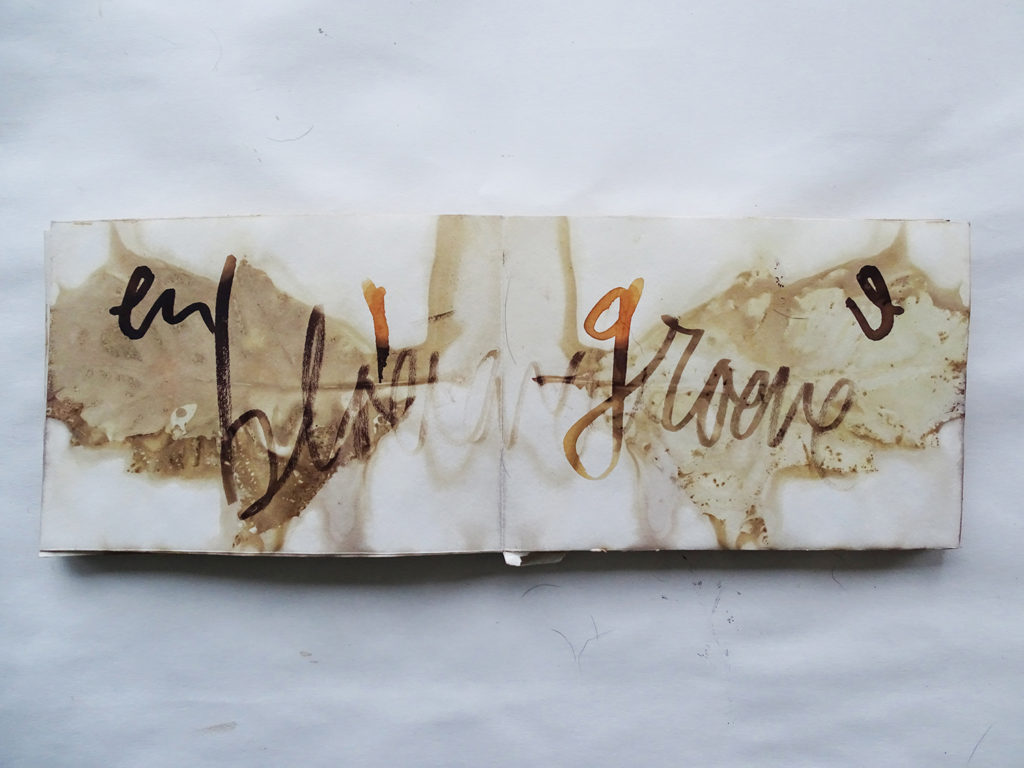
A few times I wrote poems on my paper. The poems were about the location I got the leaves and flowers from. I wrote them with ecoline brushpens on the paper. I wrote it before dipping the pages in water. (That way you don’t ruin your pens) It creates fun, abstract marks. Sometimes you see complete words, other times there is almost nothing to bee seen anymore. You can also write with waterproof pens, or even the rust water, just use an old paintbrush.
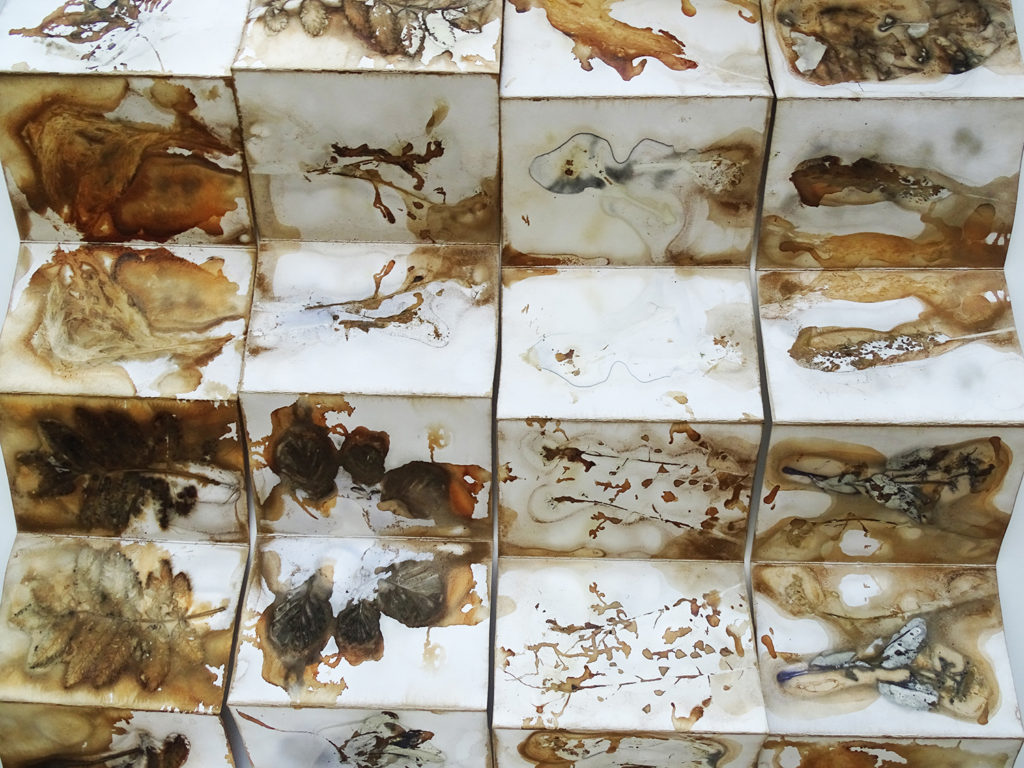
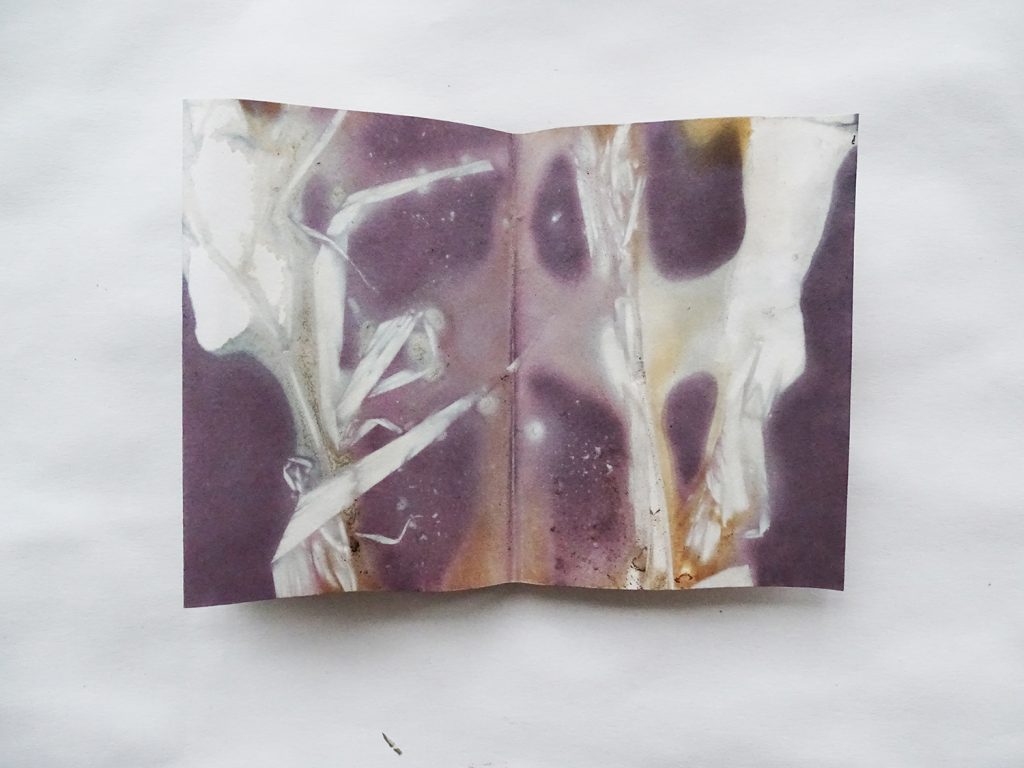
Colored paper in between your pages
Another fun thing to explore is to use colored pages between your papers. I used black paper, which gave off fun purple tones. Where the colored page touches the leaf, it shows the white paper through, but around the leaves it shows beautiful soft tones. Besides that, you get a bit of depth in your work.
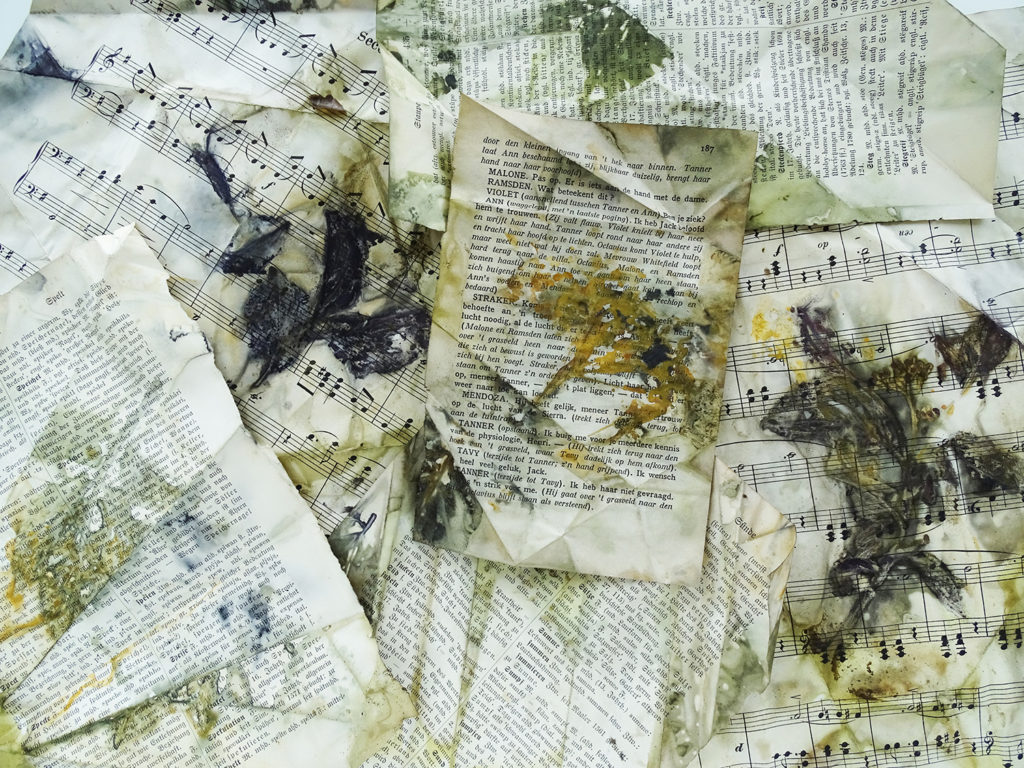
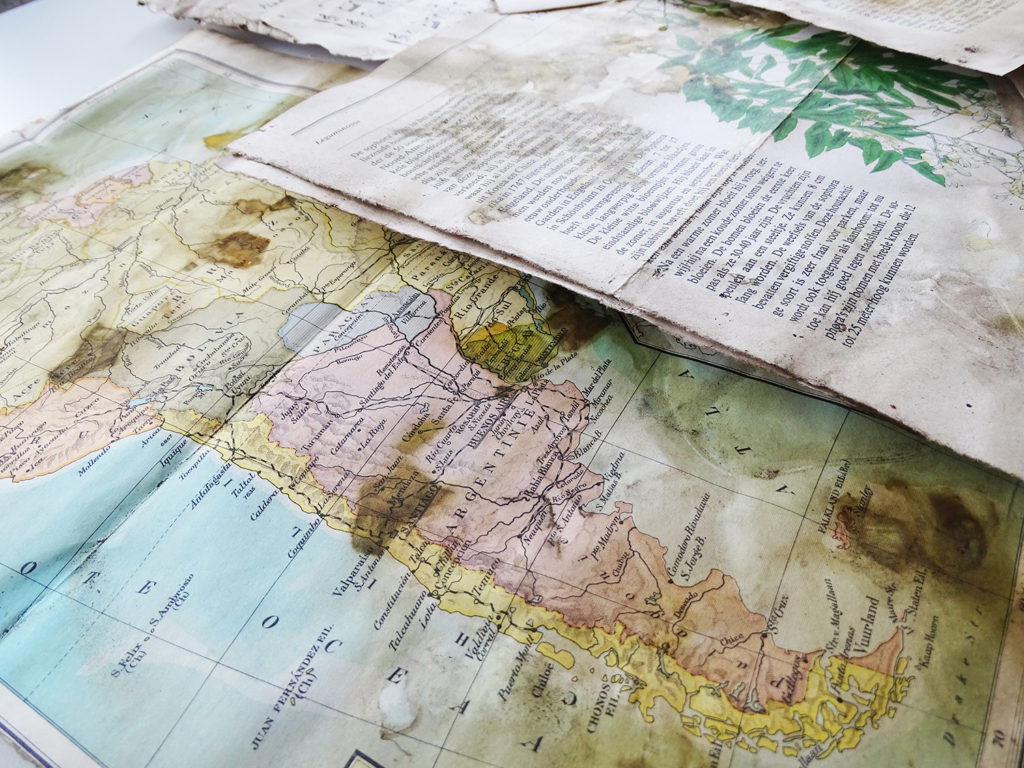
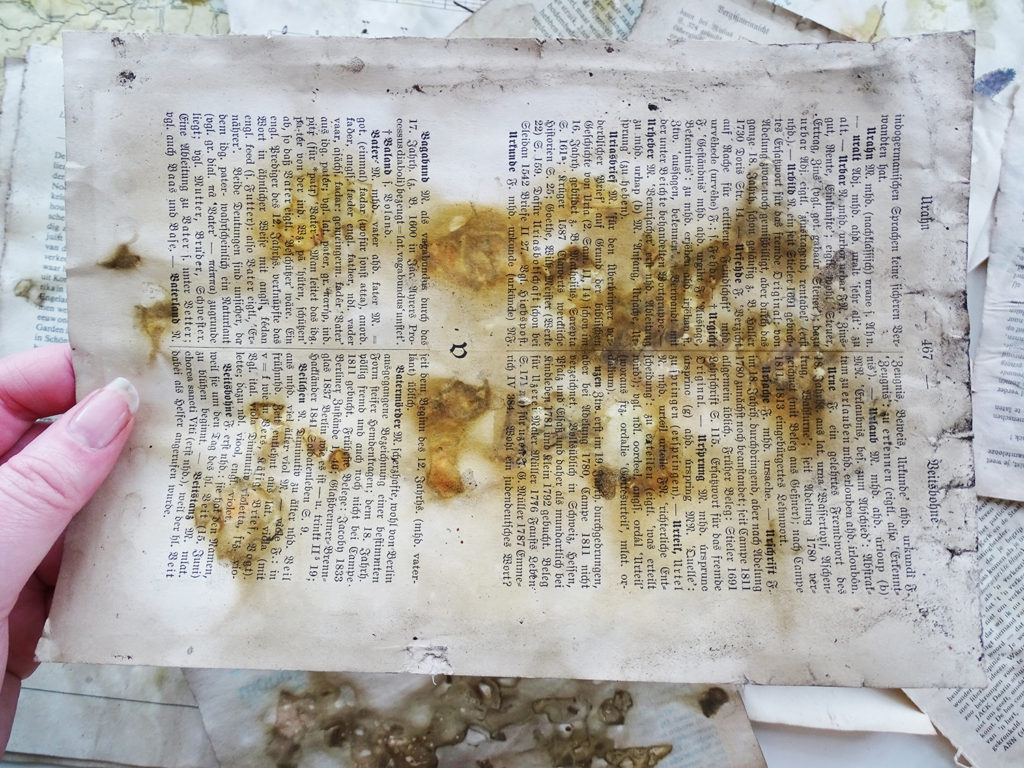
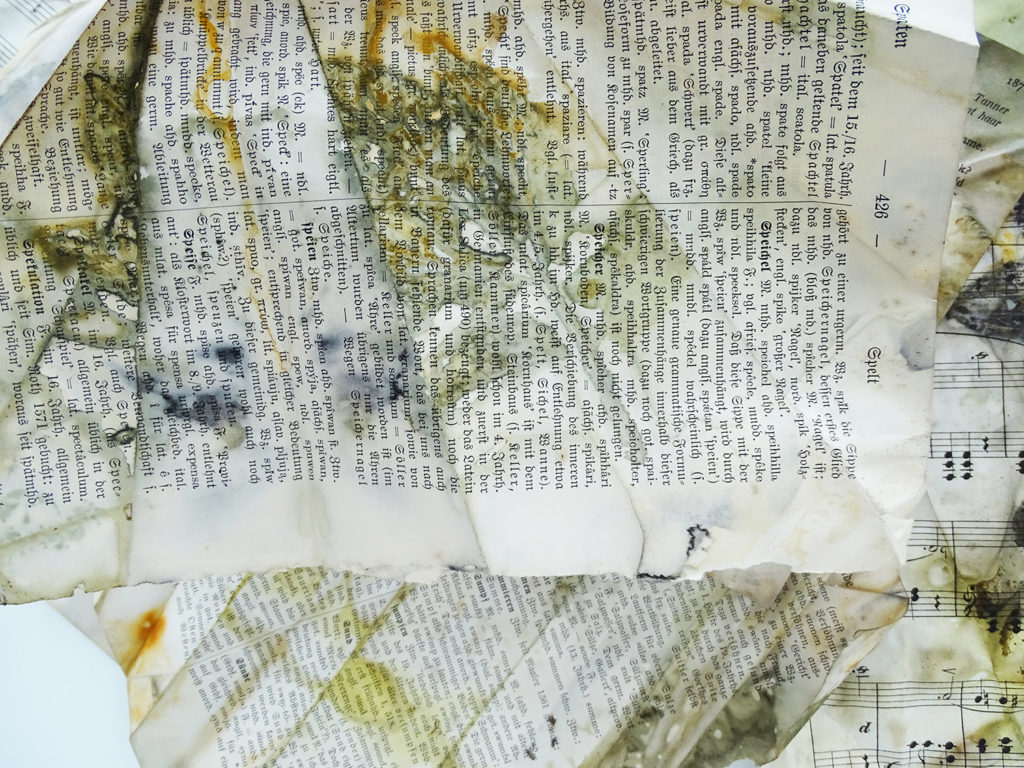
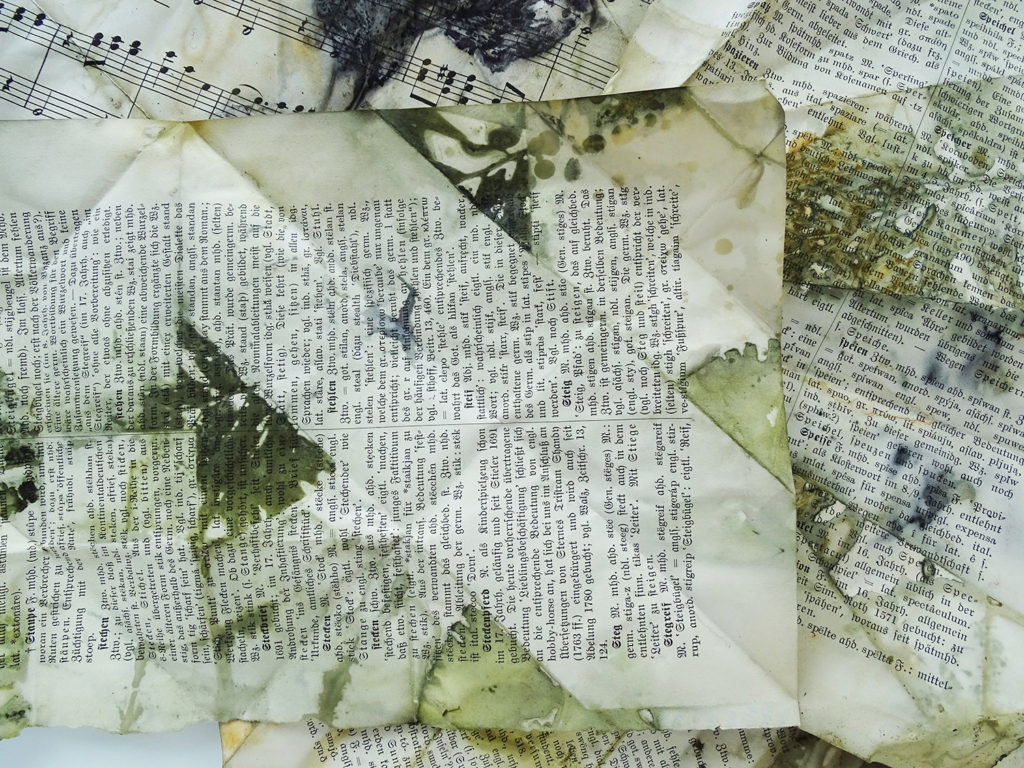
Use all kinds of paper to eco-print on
Besides regular white paper, there are lots of other options to work with. Old book pages for example. For most of the time they are way thinner, so keep that in mind. You can use old maps, pages with fun fonts, old paper, tissue paper, used cardboard packaging or sheetmusic papers.
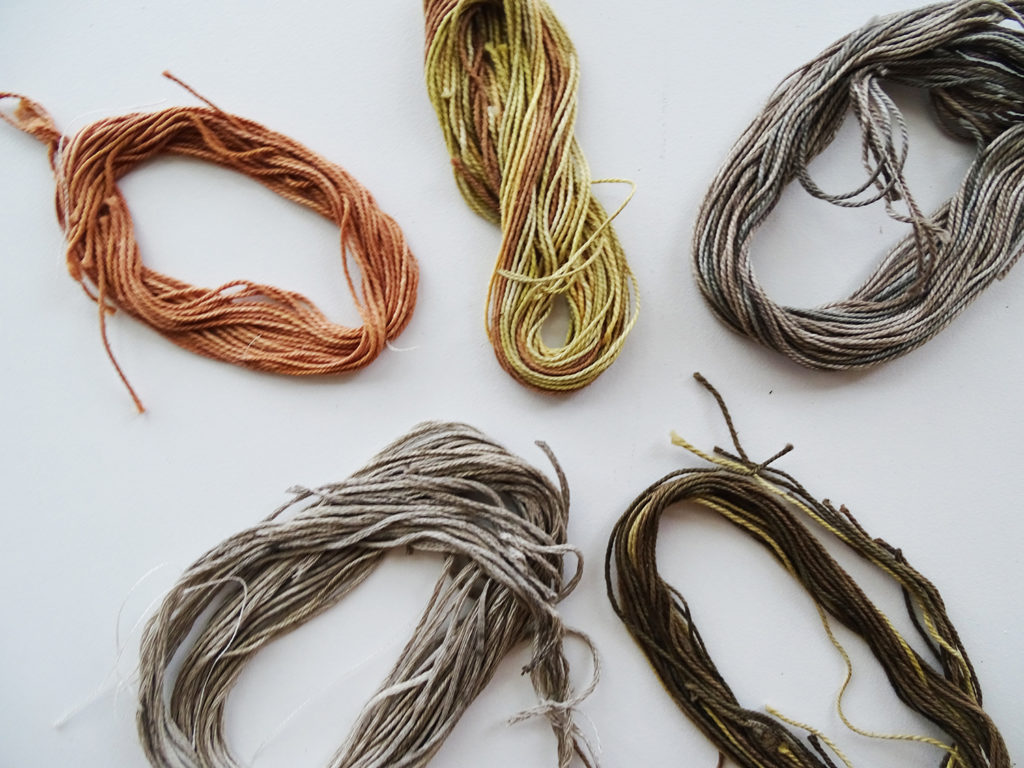
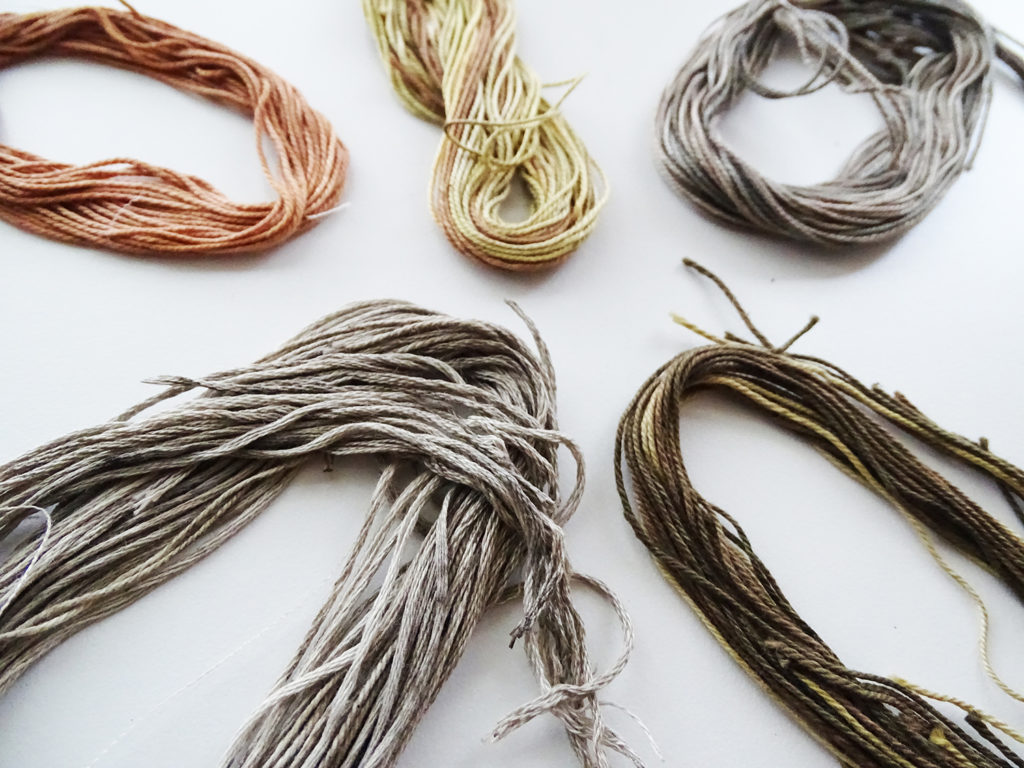
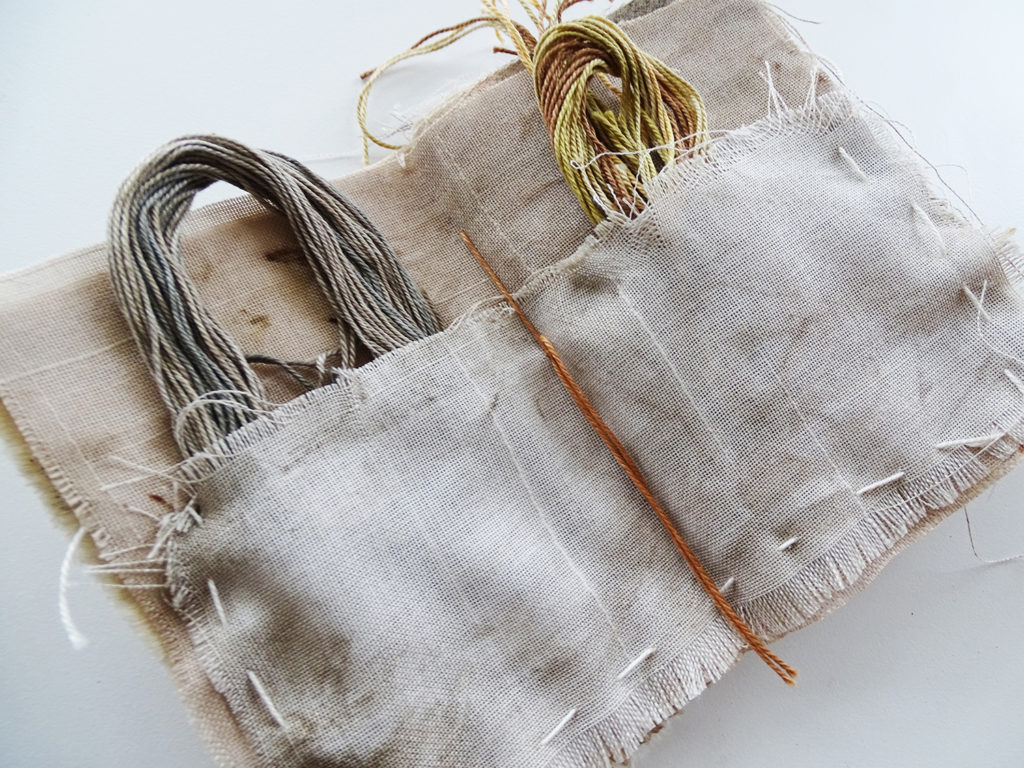
Dye your white thread in fun colors
You can eco-print on paper, on fabric, but you can also dye your thread. Throw them in the same pan your bundles are boiling in and let the magic happen. The thread can be used for slow stitching your fabrics or papers, to add a fun detail. I made a little booklet for my thread, so much fun!
Folding papers to create patterns
You can stack your papers, or fold a concertina book. Also something fun to try is shirbori folding. You can do this with fabric, but also with paper. Just fold them in all ways before stacking them together with leaves between them. And tie them just the same as I’ve explained above.
Are you inspired? Let’s create something fun!
Share your work on instagram with the hashtag I came up with: #createwithnatureclub Or tagg me! I would love to see your creations. Also, if you have any questions, please ask me! I’d love to answer them for you.
Acknowledge my teachers
I’ve read a lot of blogs about this proces, some e-books and I followed a few online courses. I’ve been experimenting a lot on my own, discovering stunning results. I’ve had a lot of dissapointing prints in the beginning, even now sometimes. But the process is just amazing. I can’t stop loving it.
Let me share some amazing artists here, who are such inspirational humans! There is India FLint, as I mentioned in my introduction. I’ve learned a lot from Louise Upshall from Gumnut Magic, her work is pure magic! The new course from Francisca Nunes is also wonderful.